
This documentation describes how to set up a Maven project for CaptainCasa.
Please use a CaptainCasa version higher than 20201012. There were quite some nice changes which were applied for CaptainCasa update 20201012 – a summary of changes is listed in the last chapter. These ones of you who already have used the CaptainCasa Maven artifacts should take a look into this chapter.
The setup of the project is described by using Eclipse as development environment. But the general steps are easily transfer-able to other development environments. - There is an extra chapter describing the configuration using IntelliJ IDEA.
CaptainCasa provides the following Maven repository location:
https://www.captaincasa.com/mavenrepository
In this repository there are a couple of artifacts:
/mavenrepository
/org
/eclnt
/eclntjsfserverRISC => CaptainCasa environment (RISC only)
/eclntjsfserver_jsfimpl => CaptainCasa mini JSF implementation
/eclntpbc => Page Bean Components (addons)
/eclntccee => CaptainCasa CCEE (addons)
/eclnteditor => CaptainCasa Editor/Toolset
...
There are two artifacts that are used to set up your Maven project.
eclntjsfserverRISC: this is the jar file that add the CaptainCasa runtime environment.
eclntwebappaddons_jsfimpl: this is the CaptainCasa mini-JSF implementation.
By default the CaptainCasa installation comes with an own Tomcat instance running the application that you build. And it comes with some tooling (Layout Editor), that manages this Tomcat:
Within the tools you “reload” (or “hot deploy”) the application. This means that actually the result of your project is copied into the corresponding Tomcat/webapps-application-folder and that the application is restarted so that changes take effect.
Of course you may also think about running some Tomcat instance which is managed by your development environment (in this text: Eclipse). But this is not the CaptainCasa-default scenario, so this documentation assumes to develop your project on the left side – and run your project in some Tomcat on the right side, having the CaptainCasa toolset as linkage between.
In other words:
Maven/Eclipse are the ones to produce the “.war”-like structure into the target directory of the project.
The CaptainCasa toolset is the one to take over this data into the Tomcat runtime.
The result is a very efficient way of developing user interfaces – which is not burdened by always running full Maven builds and by always deploying full systems to the Tomcat instance. - Debugging your application can easily be done by remote debugging.
There are two ways to create a Maven project:
the direct way by using the CaptainCasa tool set
by using Maven-project-archetypes
Both ways lead to the same result – the second one requires you to know about how to integrate Maven-project-archetypes catalogs into your development environment. So let's start with the first one:
Open “File > New Maven-project” (or “File > New Spring-Boot-project”) from the menu:
The following dialog will show up:
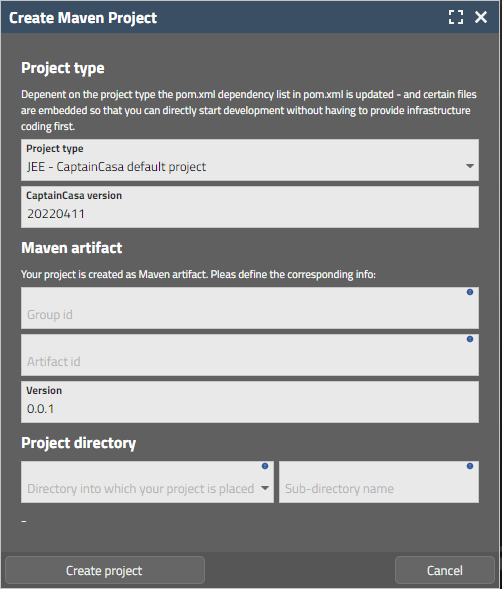
In the dialog define:
The “Group id” and the “Artifact id” and the “Version” of your project
The directory into which you project will be placed and the sub-directory which will represent your project.
Now import the Maven-project in you IDE.
Example: in Eclipse you need to …
select “File > Import...” from the menu
select “Maven > Existing Maven Projects” in the follow-on dialog
select the directory of your project
Now build the project so that dependencies are resolved and the result is written into the target-directory. Use e.g. Maven “clean package” to do this.
By reloading, the target directory of your project is copied into the webapps-directory of your local Tomcat and the web application is reloaded.
The same project can also be created using default Maven project archetypes. This chapter explains step by step how to do this.
You need to create a Maven project with archetype “eclntwebapparchetype”. The archetype is an extension of the normal webapp-archetype. It is contained in the catalog at https://www.captaincasa.com/mavenrepository/archetypecatalog.xml. - That's it!
For all non-Maven-professionals: the following chapter describes the creation of the project step by step using Eclipse as development environment.
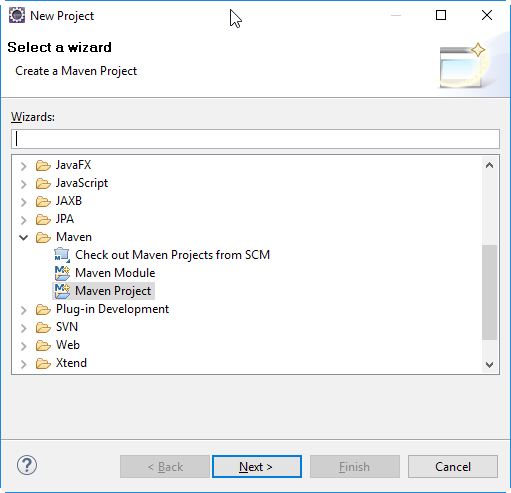
The project is created in Eclipse. Select File => New => Project...:

Select “Maven Project”:
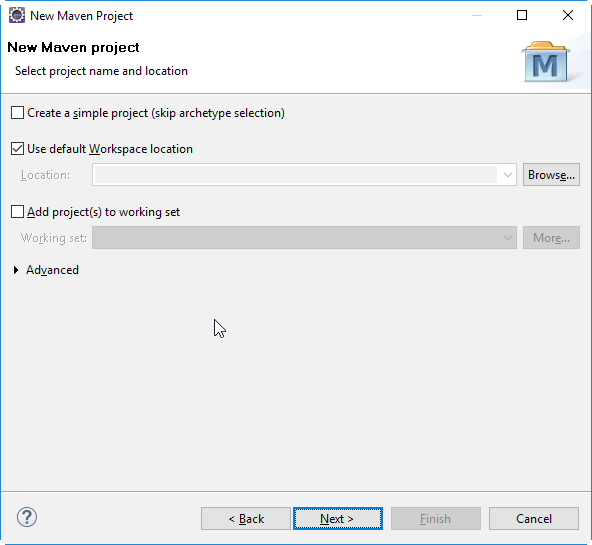
Store the project in some workspace, in this example we use the default workspace:
Now select the CaptainCasa project archetype: the dialog by default lists a couple of default archetypes that are included in some local catalog of archetypes:
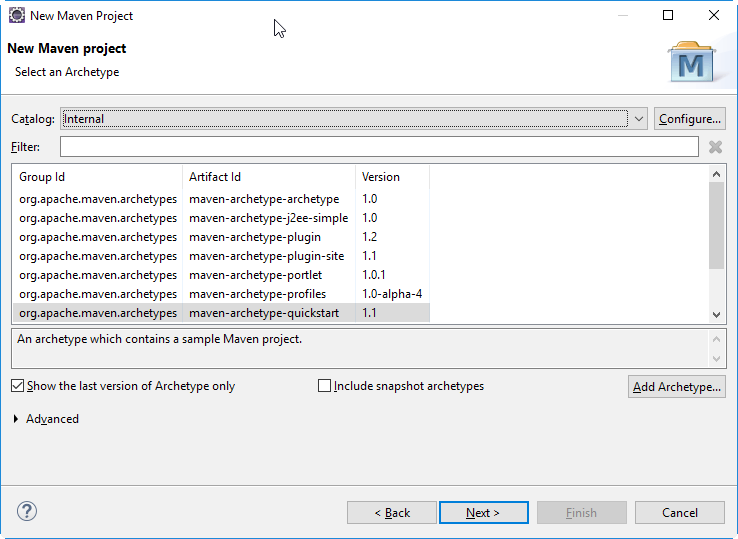
The CaptainCasa archetypes are available via URL:
https://www.captaincasa.com/mavenrepository/archetypecatalog.xml
So open the catalog configuration via the “Configure”-button, select “Add Remote Catalog...” and define the URL and a text description:
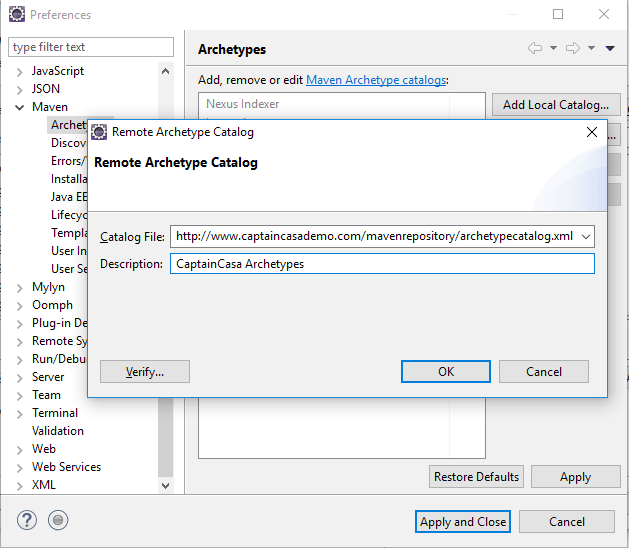
After applying the catalog, closing the dialog and sometimes waiting some seconds you can select the CaptainCasa project archetype. Use the archetype “eclntwebapparchetype”:
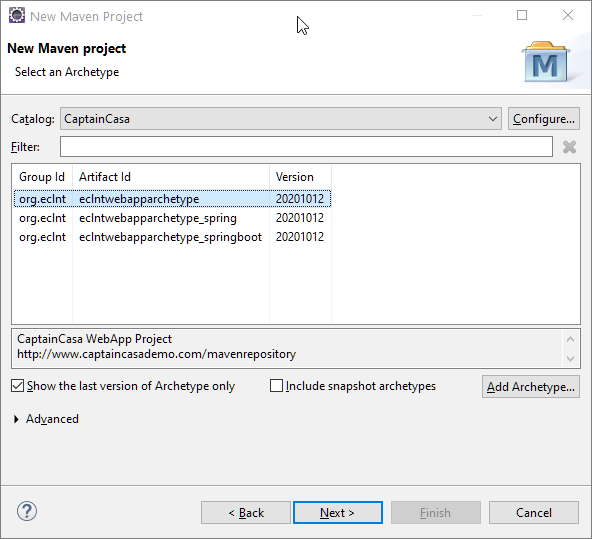
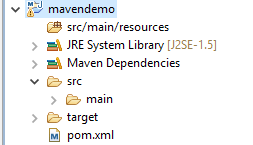
Press “Next!” and define the Maven group id and the Maven artifact id. The artifact id will be the default name of your web-application and the name of the corresponding CaptainCasa project. So if you define “mavendemo” here, then this is the name of the project within the CaptainCasa toolset, and this is the default name of your web-application within your Tomcat (“localhost:50000/mavendemo”).

After pressing “Finish” the project is created. The nature of the project is a normal web-application project, due to the selection of the CaptainCasa archetype the project already contains the right configuration files in order to quickly start with first development steps.
The following text is based on IntelliJ IDEA version 2020.1 (community edition).
Surprisingly there is an annoying issue: you first have to register the CaptainCasa repository in the settings.xml of your local Maven repository. Otherwise the project-archetypes that will be used are not found – even though you explicitly name their repository...
The default location of your local Maven repository on Windows is:
C:\Users\<userName>\.m2
Example:

In this directory there is the folder “repository” which actually holds the locally stored artifactgs – and there may be a file “settings.xml”. If it does not exist yet: create it and define the following content:
<settings xmlns="http://maven.apache.org/SETTINGS/1.0.0"
xmlns:xsi="http://www.w3.org/2001/XMLSchema-instance"
xsi:schemaLocation="http://maven.apache.org/SETTINGS/1.0.0 http://maven.apache.org/xsd/settings-1.0.0.xsd">
<profiles>
<profile>
<id>dev</id>
<repositories>
<repository>
<id>archetype</id>
<url>https://www.captaincasa.com/mavenrepository</url>
<releases><enabled>true</enabled></releases>
<snapshots><enabled>true</enabled></snapshots>
</repository>
</repositories>
</profile>
</profiles>
<activeProfiles>
<activeProfile>dev</activeProfile>
</activeProfiles>
</settings>
...and now you are ready to create the project with IntelliJ IDEA!
Select “File > New > Project...” from the menu and the following dialog will appear:
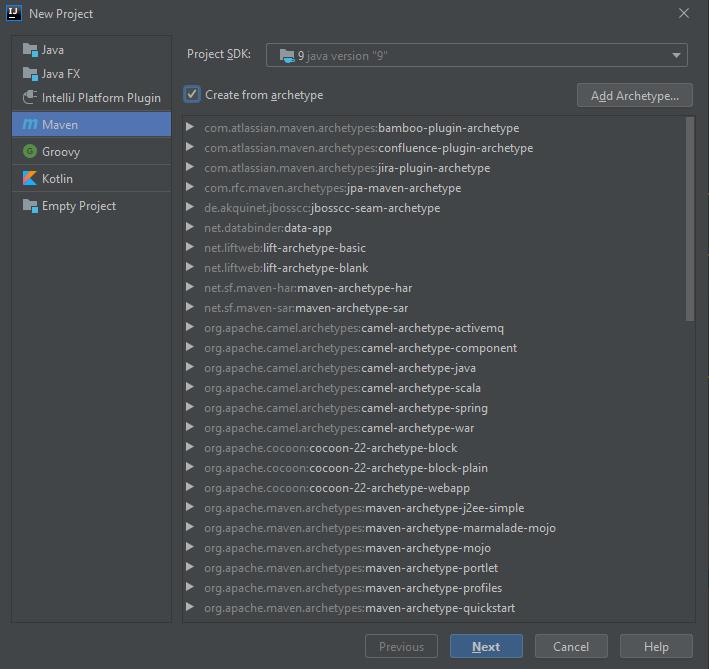
Select “Maven” on the left and select “Create from archetype”.
You now can add the project archetype(s) from CaptainCasa by pressing the “Add Archtetype...” button:
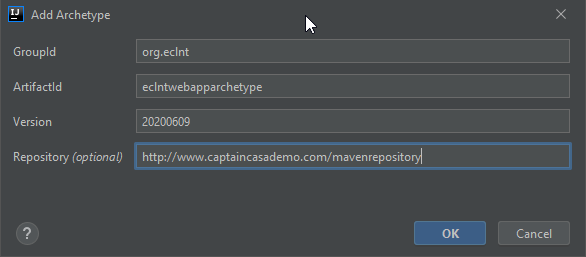
Enter the following information:
GroupId = “org.eclnt”
ArtifactId = “eclntwebapparchetype”
Version = e.g.“20200609” (please use the newest CaptainCasa version!)
Repository = “https://www.captaincasa.com/mavenrepository”
After pressing “OK” the archetype is part of the list of archetypes:
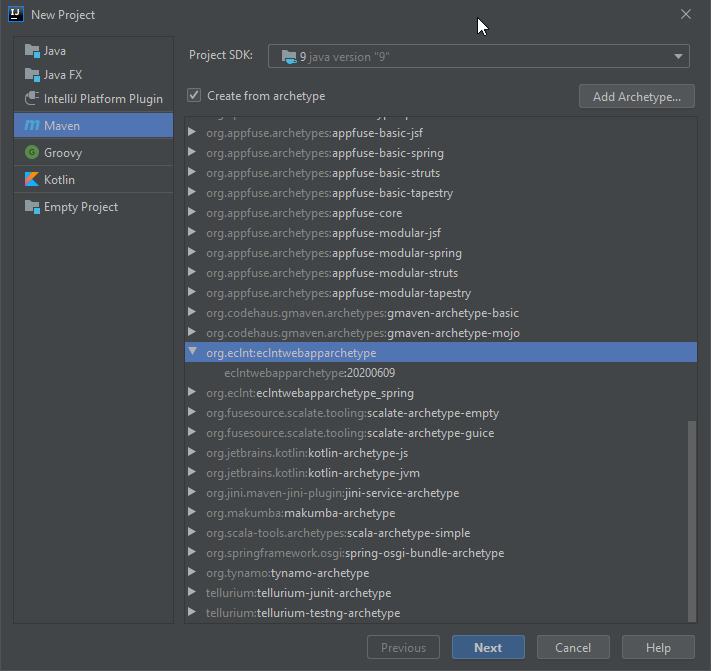
Select this archetype and press “Next”:
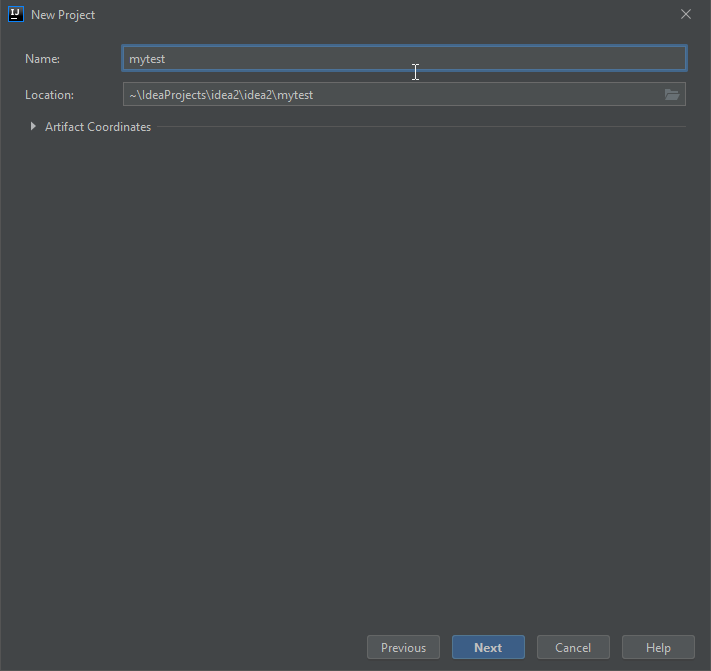
Define the name of the project and press “Next” and then in the next window “Finish”.
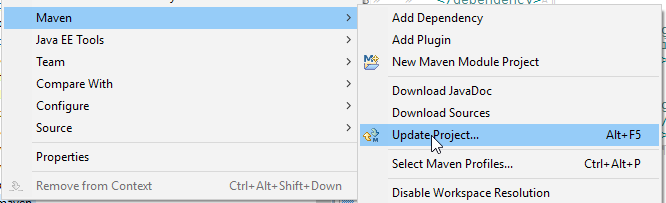
Update the project by calling “Maven → Update Project...” after right clicking onto the project. And because this is a step that you have to do quite frequently...: keep in mind the short key to do this, it's “alt-F5”...
Now you can first time execute the Maven build to check if things come together as planned. Start the Maven build by right clicking onto the project and selecting “Run => Maven build...”:

In the dialog that pops up define “clean install” as goal:
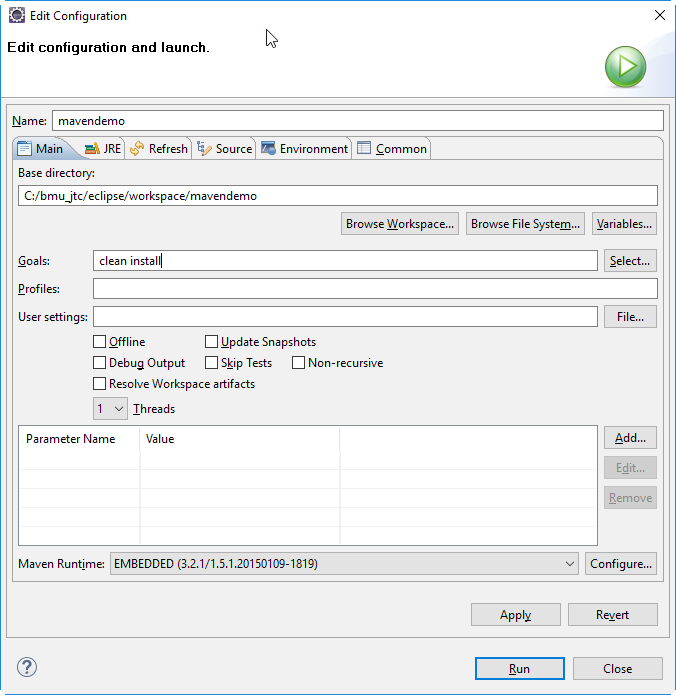
Now press “Run”. You may have to wait a bit of time when executing the build the first time because the CaptainCasa artifacts are loaded into your Maven repository in the background. You may observe the execution of the build within the Console view of Eclipse.
Open the Maven view of your project:
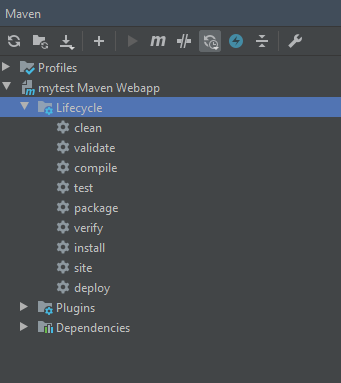
Run the “clean” and afterwards the “install” task by right clicking the task and selecting “Run Maven Build”.
The project is up and running – and it delivers a .war file as result within its target directory. You now could manually edit XML-layout definitions (.jsp files) in the webapp part of the project, add images, add managed bean implementations, etc. - But of course we recommend to use the CaptainCasa toolset in order to more easily do this, and in order to deploy this to some Tomcat runtime in an efficient way. This is what the next chapter is about.
Start your CaptainCasa toolset, and Select “File => Import project...”.
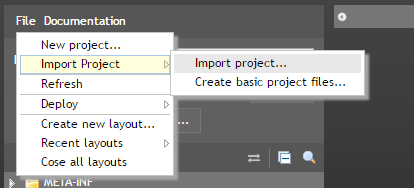
Define the directory location of your project's root directory and press “Import”:

The project will be registered within the CaptainCasa toolset.
You now can develop/make your project with Eclipse/Maven and you can in parallel work with the CaptainCasa toolset editing dialogs (.jsp) and for deploying the application (“Reload”) to the Tomcat-runtime.
The project contains a pom.xml in its root directory:
The content looks like:
<project xmlns="http://maven.apache.org/POM/4.0.0" xmlns:xsi="http://www.w3.org/2001/XMLSchema-instance"
xsi:schemaLocation="http://maven.apache.org/POM/4.0.0 http://maven.apache.org/maven-v4_0_0.xsd">
<modelVersion>4.0.0</modelVersion>
<groupId>mytest</groupId>
<artifactId>mavendemo</artifactId>
<packaging>war</packaging>
<version>0.0.1-SNAPSHOT</version>
<name>mavendemo Maven Webapp</name>
<url>http://maven.apache.org</url>
<repositories>
<repository>
<id>org.eclnt</id>
<url>https://www.captaincasa.com/mavenrepository</url>
</repository>
<!-- Repository for dependent artifacts -->
<repository>
<id>mvnrepository.com</id>
<url>https://mvnrepository.com/repos/central</url>
</repository>
<repository>
<id>org.outerj</id>
<url>https://maven.atlassian.com/3rdparty/</url>
</repository>
</repositories>
<properties>
<!-- This is the CaptainCasa version to be used. -->
<cc.version>20201012</cc.version>
</properties>
<dependencies>
<dependency>
<groupId>javax.servlet</groupId>
<artifactId>javax.servlet-api</artifactId>
<version>3.1.0</version>
<scope>provided</scope>
</dependency>
<dependency>
<groupId>javax.servlet.jsp</groupId>
<artifactId>javax.servlet.jsp-api</artifactId>
<version>2.3.1</version>
<scope>provided</scope>
</dependency>
<dependency>
<groupId>javax.servlet.jsp.jstl</groupId>
<artifactId>jstl-api</artifactId>
<version>1.2</version>
<scope>provided</scope>
</dependency>
<dependency>
<groupId>org.eclnt</groupId>
<artifactId>eclntjsfserverRISC</artifactId>
<version>${cc.version}</version>
</dependency>
<dependency>
<groupId>org.eclnt</groupId>
<artifactId>eclntjsfserver_jsfimpl</artifactId>
<version>${cc.version}</version>
</dependency>
<dependency>
<!-- PDF creation in grid processing -->
<groupId>com.lowagie</groupId>
<artifactId>itext</artifactId>
<version>2.1.7</version>
</dependency>
<dependency>
<!-- HTML sanitizing -->
<groupId>org.jsoup</groupId>
<artifactId>jsoup</artifactId>
<version>1.10.3</version>
</dependency>
<dependency>
<groupId>com.google.code.gson</groupId>
<artifactId>gson</artifactId>
<version>2.8.5</version>
</dependency>
<dependency>
<groupId>org.owasp.esapi</groupId>
<artifactId>esapi</artifactId>
<version>2.1.0.1</version>
<exclusions>
<exclusion>
<groupId>log4j</groupId>
<artifactId>log4j</artifactId>
</exclusion>
</exclusions>
</dependency>
<dependency>
<!-- JAXB not contained in JRE from Java 9 on -->
<groupId>org.glassfish.jaxb</groupId>
<artifactId>jaxb-runtime</artifactId>
<version>2.3.1</version>
</dependency>
<!--
Optional CaptainCasa packages:
eclntccee - utilitities + DB access/mapping
eclntccee_spring - Spring integeration
eclntpbc - Page Bean Components addon
-->
<!--
<dependency>
<groupId>org.eclnt</groupId>
<artifactId>eclntccee</artifactId>
<version>${cc.version}</version>
</dependency>
<dependency>
<groupId>org.eclnt</groupId>
<artifactId>eclntccee_spring</artifactId>
<version>${cc.version}</version>
</dependency>
<dependency>
<groupId>org.eclnt</groupId>
<artifactId>eclntpbc</artifactId>
<version>${cc.version}</version>
</dependency>
-->
</dependencies>
<build>
<finalName>mavendemo</finalName>
<plugins>
<plugin>
<groupId>org.apache.maven.plugins</groupId>
<artifactId>maven-war-plugin</artifactId>
<version>3.3.1</version>
</plugin>
<plugin>
<groupId>org.apache.maven.plugins</groupId>
<artifactId>maven-compiler-plugin</artifactId>
<version>3.1</version>
<configuration>
<source>1.6</source>
<target>1.6</target>
</configuration>
</plugin>
</plugins>
</build>
</project>
What is the basic content within the pom.xml?
The pom contains several maven repositories including the one of CaptainCasa: http://www.captaincasa.com/mavenrepository
There are a couple of dependencies:
eclntjsfserverRISC – this is is the CaptainCasa server runtime library
eclntjsfserver_jsfimpl – this is the mini-JSF implementation of CaptainCasa
servlet-api/jsp-api – the libraries for servlet and JSP-tag management
...other libraries used for special tasks – please check the corresponding comments within the pom.xml
The plugin content is:
“maven-compiler-plugin”: the project is using Java version “1.6”.
The environment that was created during all this procedure now is:
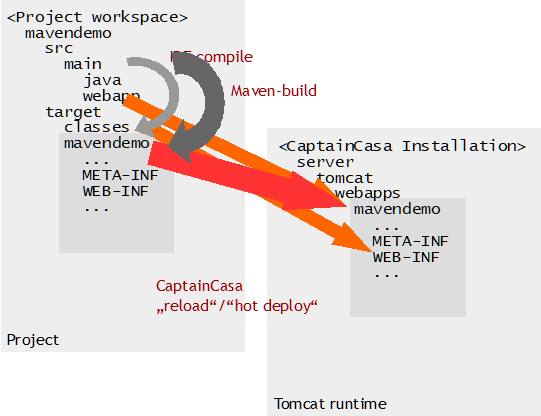
The rounded arrows are showing the typical steps during development:
You compile your Java programs from “src/main/java” to “target/classes”
You from time to time make full Maven builds into the “target/<projectName>” directory
The straight arrows are showing what happens when a “Reload” is executed within the CaptainCasa toolset:
The complete “target/<projectName>” directory is copied into the corresponding “tomcat/webapps/<projectName>” directory.
The content of the “src/main/webapps” folder is copied into the corresponding “tomcat/webapps/<projectName>” directory.
The content of the “target/classes” folder is copied into the corresponding “tomcat/webapps/<projectName>/WEB-INF/classes” or into the “tomcat/webapps/<projectName>/eclnthotdeploy/classes” folder – according to hot deployment rules.
After the copying the “Reload” then restarts the “<projectName>”-web application by using the Tomcat manager API.
You may wonder: why are there three copying steps for loading the application into the Tomcat – and not only one, copying the Maven-target into the Tomcat-webapps?
The reason is that by this procedure the number of Maven builds that you need to do during development time is drastically reduced. A Maven build typically takes quite some time, and it is just annoying to execute this build after every simple development activity.
Due to the copying above the Tomcat is constantly updated not only from the “target/<projectName>” directory, but also from the directories in which you typically work in when doing UI developments. You only have to run a full Maven build, if really e.g. changing dependencies, so that new .jar files are to be copied into the Tomcat environment.
Just as with usual CaptainCasa projects you can use hot deployment to significantly reduce deployment times. Hot deployment is activated from the CaptainCasa tool set:
Open “Configuration → Hot Deployment”...
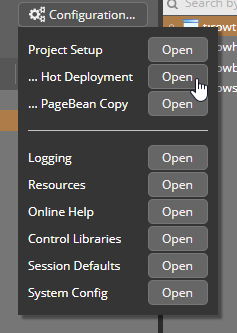
...and defined the packages to be hot deployed (or “all packages”) in the follow-on dialog:
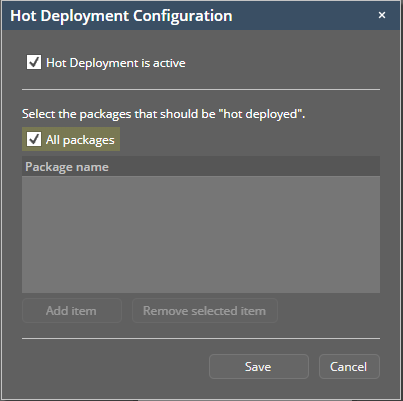
More details on Hot Deployment are contained in the Developers' Guide.
After having created your project with e.g. CaptainCasa version “20180102” you may later on update to a newer CaptainCasa version (e.g. 20180205”). For updating your project to a new CaptainCasa version you just need to execute the following steps:
Update the version number within the pom.xml. The version number is kept in the property “cc.version” and is centrally defined at the beginning of the pom.xml.
Execute a “Maven refresh” within your project (at least if you are using Eclipse).
Execute a Maven-“clean install” with your project.
Execute a “Clean & Reload” of the project within the CaptainCasa tool set to deploy the updates to the Tomcat runtime.