Create a Maven-project
-

-
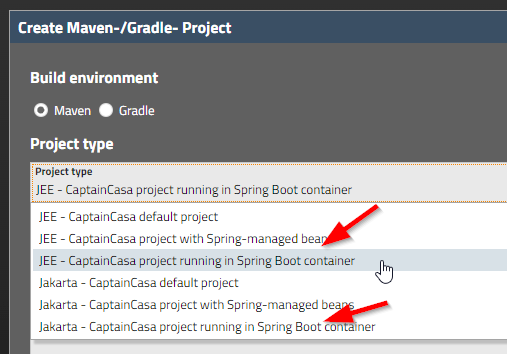
Select project type “Spring Boot Container” - either the JEE or the Jakarta variant
-
Start development just like in normal Maven projects!
CaptainCasa by default uses a Tomcat servlet container in which web applications are deployed at development time or in production scenarios (.war deployment). Of course any other servlet container (Jetty, JBoss, ...) can be used that supports Servlet API 3.1.
And there is also Spring Boot...! Spring Boot is liked by many developers because it produces self containing result files (.jar or .war) which incorporate the runtime container (Tomcat), so that you do not require an explicit e.g. Tomcat installation to deploy your system to – you can directly run it from the .jar or .war file.
Before reading this documentation: please read the documentation “Setting up a Maven Project”. The principal procedure is exactly the same as with a normal CaptainCasa-Maven project!
The CaptainCasa Spring Boot integration includes the following functions:
“Normal” creation of .war/.jar packaged Spring Boot result files
Integration of the Spring Boot-project into the CaptainCasa tool-set for efficient development
Reloading of classes using Spring's live reload functions
All you need to do is:
Create a Maven-project
Select project type “Spring Boot Container” - either the JEE or the Jakarta variant
Start development just like in normal Maven projects!
In the following text Eclipse is used as IDE. Any other IDE can be used as well, of course.
Create a new project...
...and select Maven-project type “Spring Boot” - either the JEE or the Jakarta variant:
In the following we will use:
the Maven group id “sbtut1”
Maven artifact id “sbtut1”
So the project creation dialog might look like:

After pressing the “Create project” button the project will be created in the corresponding directory.
Now import the project into your IDE. For Eclipse you have to select the command “File > Import”:
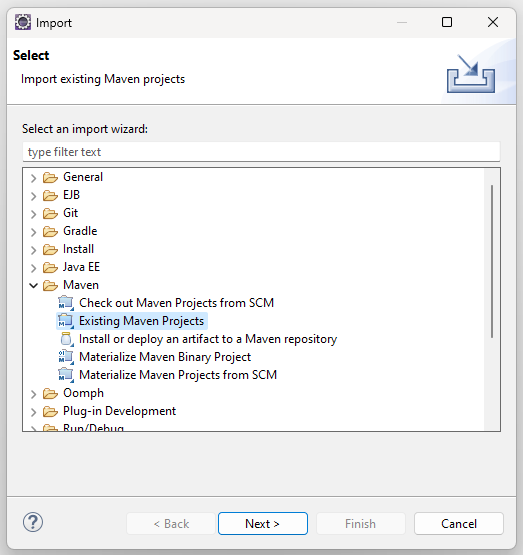
Select “Maven > Existing Maven project”, define the project directory in the next dialog and import the project.
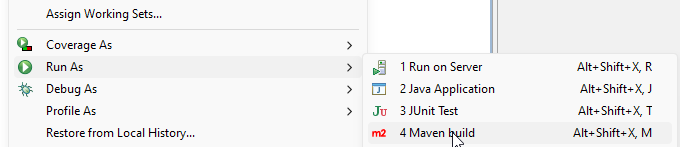
Now build your project by right clicking onto the project and selecting “Run as > Maven build”:
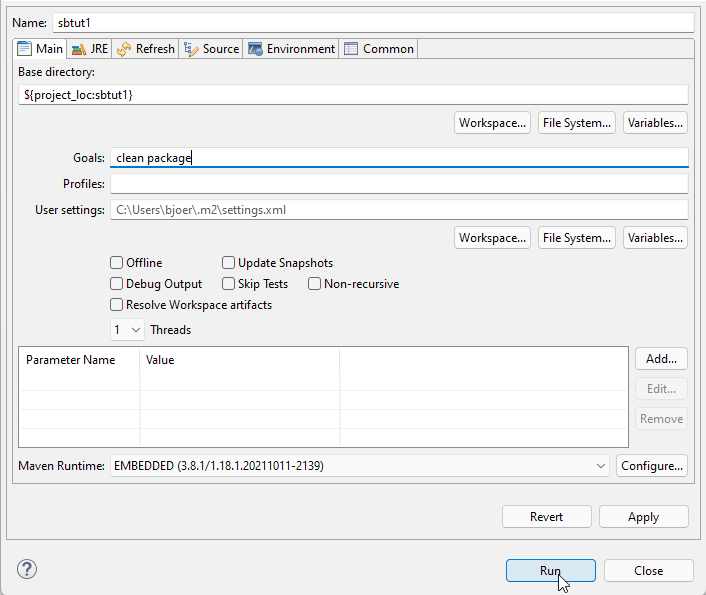
In the following dialog define the Maven goals “clean package”:
In the console you should see some output ending with...
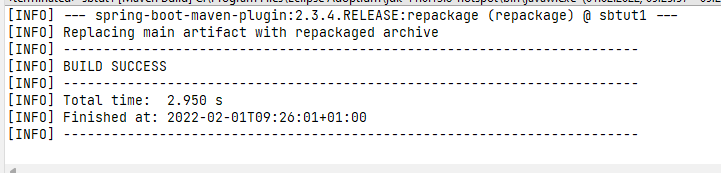
...and in the project you should see that the corresponding application was created within the target directory:
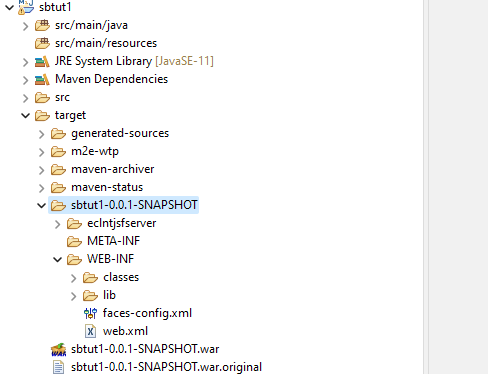
You may have to refresh your file tree in Eclipse (right mouse button menu, select “Refresh”).
Your project is now set up and build! You can now switch to the CaptainCasa Layout Editor and use the “Deploy” button to transfer your project into the Tomcat runtime.
You may now directly begin to develop CaptainCasa dialogs – without using CaptainCasa tooling at all. - Of course, we strongly recommend to use the tooling!...
Create the file “<project>/src/main/webapp/test.xml” and define its content as:
<?xml version="1.0" encoding="utf-8"?>
<t:layoutdefinition
xmlns:t="http://www.CaptainCasa.com/controllibrary/t">
<t:beanprocessing id="g_1" beanbinding="#{d.TestUI}" />
<t:rowtitlebar id="g_2" text="Hello world" />
<t:rowbodypane id="g_4" rowdistance="20">
<t:row id="g_6">
<t:field id="g_7" labeltext="Your name"
text="#{d.TestUI.name}" width="100%" />
</t:row>
<t:row id="g_3">
<t:button id="g_9"
actionListener="#{d.TestUI.onHelloAction}" text="Say Hello"
width="150+" />
</t:row>
<t:rowdistance id="g_13" height="20" />
<t:row id="g_5">
<t:label id="g_11" labeltext="Result"
text="#{d.TestUI.result}" />
</t:row>
</t:rowbodypane>
</t:layoutdefinition>
This is the layout definition of a dialog.
Now create the program “<project>/src/main/java/managedbeans/TestUI.java”:
package managedbeans;
import java.io.Serializable;
import org.eclnt.editor.annotations.CCGenClass;
import org.eclnt.jsfserver.defaultscreens.Statusbar;
import org.eclnt.jsfserver.pagebean.PageBean;
@CCGenClass (expressionBase="#{d.TestUI}")
public class TestUI
extends PageBean
implements Serializable
{
// ------------------------------------------------------------------------
// members
// ------------------------------------------------------------------------
String m_result = "<not yet defined>";
String m_name;
// ------------------------------------------------------------------------
// constructors & initialization
// ------------------------------------------------------------------------
public TestUI()
{
}
public String getPageName() { return "/test.xml"; }
public String getRootExpressionUsedInPage() { return "#{d.TestUI}"; }
// ------------------------------------------------------------------------
// public usage
// ------------------------------------------------------------------------
public void onHelloAction(javax.faces.event.ActionEvent event)
{
if (m_name == null)
{
Statusbar.outputError("Please define your name");
return;
}
m_result = "Hello world, " + m_name + "!";
}
public String getResult() { return m_result; }
public void setResult(String value) { this.m_result = value; }
public String getName() { return m_name; }
public void setName(String value) { this.m_name = value; }
}
Run the project via Maven (“right mouse click > Run As... > Maven Build...”) and now define the tasks:
clean package spring-boot:run
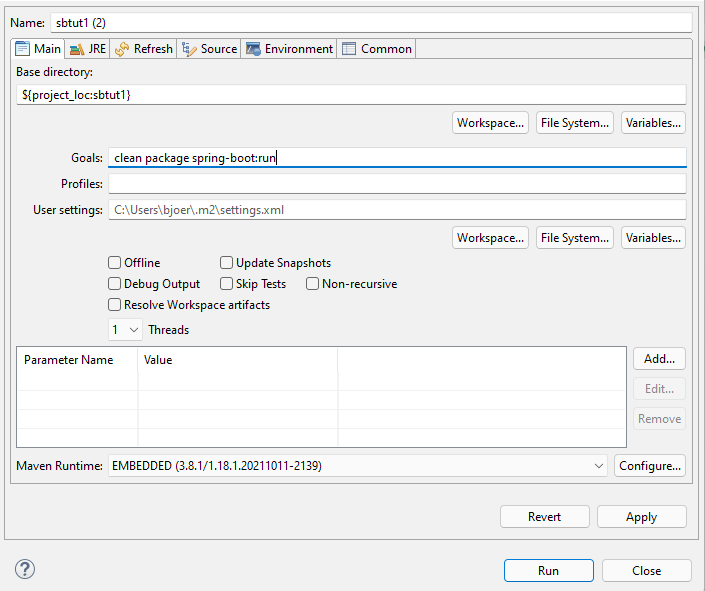
The Spring Boot container will be started – you may observer corresponding output within the console window of Eclipse. If the start is successful then you may directly open up the browser and check the dialog.
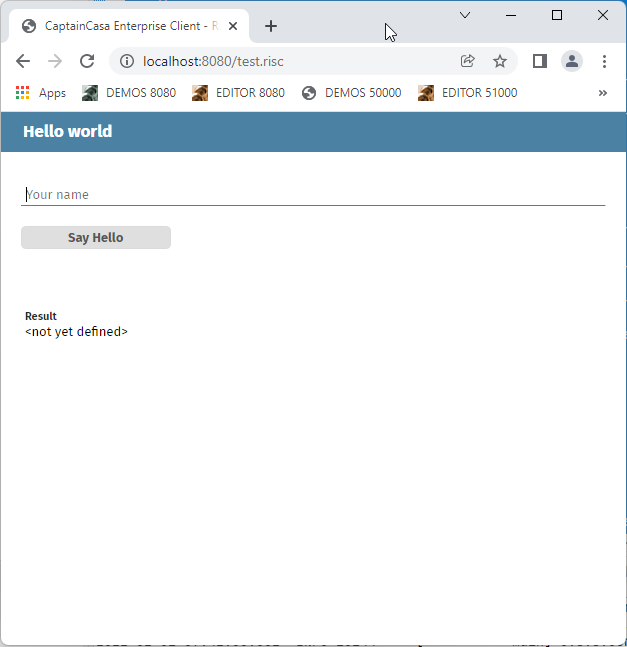
Open the URL...
http://localhost:8080/test.risc
...and you should see the test page:
If you do not see the page then first check the console log of the Spring Boot container: in most cases the port which is used (8080) is already used by another program. Stop this program and/or re-configure the port of the Spring Boot container.
You now could continue development by updating the XML file in the text editor, by updating the code, by adding new dialogs, etc. After updating the files in the project you need to restart the already Spring Boot container (or you may use Spring Boot's live-reload functions to keep the container running, see chapter below).
But: of course it is nicer to uses the CaptainCasa tool-set – so that you can edit layouts and generate code structures in an efficient and much more comfortable way.
Start the CaptainCasa environment by:
Start the “Application Tomcat” (port 50000) using:
<installDir>/A_startserver_debug.bat (corresponding shell script on Linux side...)
(We always recommend to start the server in debug mode for development purposes...)
Start the “Tool Tomcat” (port 51000) using:
<installDir>/C1_starttoolsserver.bat (corresponding shell script on Linux side...)
Open the tool page in the browser:
Your browser should look like:

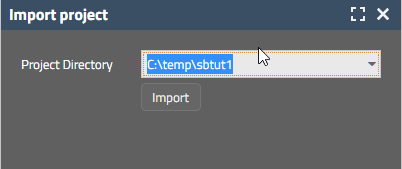
Open “File > Import project...” from the menu...
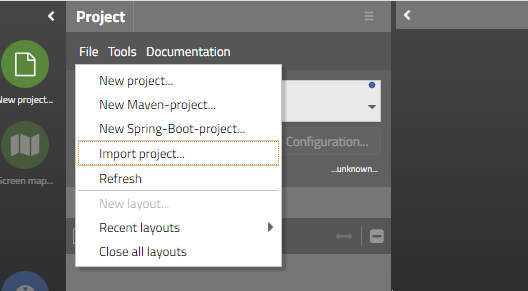
...and select the project directory of your Spring Boot project:
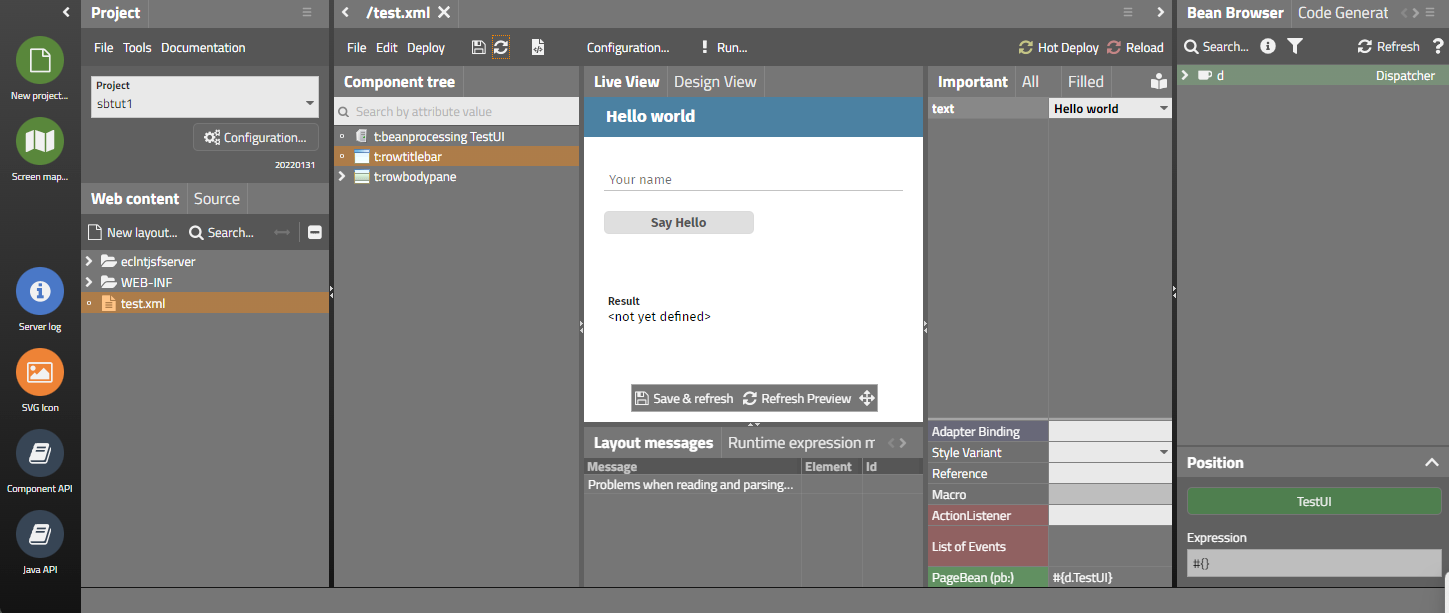
The project will be loaded. If you already created the test.xml-dialog from the previous chapter you can directly double-click and edit it:
Now you can work with the tool set “just as normal”, including:
creation of new dialogs
creating the code of new dialogs
using hot deployment for code changes and/or reload for major changes
All the artifacts that your create or edit are files within your Maven project – there is no management of redundancy, the original files of the project are used.
The CaptainCasa tool set loads the application that you develop into its “Application Tomcat” (port 50000). In this Tomcat you will see the corresponding “webapp”:
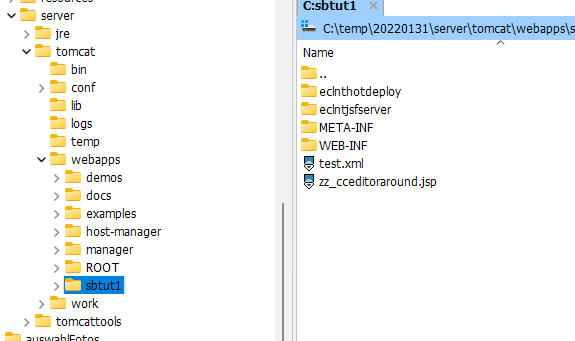
This means: the project is not running in the Spring Boot container but is running in the Tomcat server that comes as “Application Tomcat” (port 50000). Spring Boot always both runs in an own environment (actually Spring Boot does nothing else than packaging some Tomcat around the application...) and it runs the same way in a normal Tomcat environment.
Please check the project file (.ccproject) that describes the integration between the Spring Boot project and the tool set:
<project
copywebapp="true"
javaclassdirectory="${project}/target/classes"
javasourcedirectory="${project}/src/main/java"
layoutdefinintionssavedasxml="true"
managedbycctoolset="false"
propertyfilesdirectory="${project}/src/main/resources"
reloadwebapp="true"
webappaddonsdirectory="${project}/webcontentcc"
webcontentdeploydirectory="${deploytomcatwebappsdir}/${projectname}"
webcontentdirectory="${project}/src/main/webapp"
webcontextroot="${projectname}"
webhostport="localhost:${deploytomcatport}">
<deploycopyinfo
fromdir="${project}/target/${projectname}-0.0.1-SNAPSHOT"
todir="${projectdeploy}">
</deploycopyinfo>
<hotdeploymentpackage
name="*">
</hotdeploymentpackage>
</project>
The “${project}” variable points to the root directory of the project (in our example this way: “C:\temp\sbtut1”). So you see how the tool set knows where to look for layouts (“webcontentdirectory”-attribute) or where to look for code (“javasourcedirectrory”).
An interesting but important item is the “deploycopyinfo” element: this tells the toolset that the un-packaged application is contained in the target-directory of the project – which is exactly the one that is “filled” when executing the Maven “clean package”.
When reloading or hot deploying a project then the tool set will always:
first execute the “deploycopyinfo” steps
and then execute a copying of
the webcontent and (“webcontentdirectory”)
the current Java classes (“javaclassdirectory”)
This means: for normal development of dialogs you very seldomly have to execute the “big Maven build” (“clean package”) within the Spring Boot project. The “relaod” and “hotdeploy” will automatically copy the changed classes and webapp-resources on top of the files that result from the last Maven build.
You now have a created a Spring Boot project with CaptainCasa included.
The project may be run
as standalone Spring Boot container
as deployment within a Tomcat (or other) JEE environment
While in the normal Maven project you use “mvn clean pacakge” to build the project, you now use “mvn clean spring-boot:run” to build and start your project.
Because CaptainCasa's layout tools require access to the “.war” image of the project we recommend to combine both and always call:
mvn clean package spring-boot:run
As result both the .war image will be built and the Spring Boot runtime will be started.
There are several ways to start the Spring Boot container in debug mode. One way is to adapt the pom.xml in the following way:
...
<build>
<plugins>
<plugin>
<groupId>org.springframework.boot</groupId>
<artifactId>spring-boot-maven-plugin</artifactId>
<configuration>
<jvmArguments>
-Xdebug -Xrunjdwp:transport=dt_socket,server=y,suspend=n,address=50010
</jvmArguments>
</configuration>
</plugin>
</plugins>
</build>
...
The live reload functions of Spring can be just used in a normal way. This means: you have to add the following to your pom.xml:
<dependency>
<groupId>org.springframework.boot</groupId>
<artifactId>spring-boot-devtools</artifactId>
<optional>true</optional>
</dependency>
During development your project is run in two runtimes:
By importing it into the CaptainCasa toolset, the project is executed in the Tomcat servlet container that comes with CaptainCasa. Every time you call “Reload” or “Hot Deploy” in the toolset, a copying of files from the project into the Tomcat instance is executed. The Tomcat is the one to show the dialog previews when editing layouts.
By running the project via “mvn clean install spring-boot:run” and/or by executing the “.war”-file that is created your application runs in a Spring Boot environment - or, in other words: it runs in a Tomcat that is added around your application by Spring Boot.
The project archetype adds some Spring-Starter class into the project:
package springbootstartup;
import java.util.HashSet;
import java.util.Set;
import javax.servlet.ServletContext;
import javax.servlet.ServletException;
import javax.servlet.SessionTrackingMode;
import org.eclnt.jsfserver.managedbean.HotDeployManager;
import org.eclnt.jsfserver.util.CCInitialize;
import org.springframework.boot.SpringApplication;
import org.springframework.boot.autoconfigure.SpringBootApplication;
import org.springframework.boot.web.servlet.ServletContextInitializer;
import org.springframework.context.ApplicationContext;
import org.springframework.context.annotation.Bean;
import org.springframework.web.context.ServletContextAware;
import org.springframework.web.socket.server.standard.ServerEndpointExporter;
@SpringBootApplication
public class SBApplication
{
public static void main(String[] args)
{
SpringApplication.run(SBApplication.class, args);
}
@Bean
public ServletContextAware endpointExporterInitializer(final ApplicationContext applicationContext)
{
return new ServletContextAware()
{
@Override
public void setServletContext(ServletContext servletContext)
{
// code from https://stackoverflow.com/questions/25390100/using-java-api-for-websocket-jsr-356-with-spring-boot
ServerEndpointExporter exporter = new ServerEndpointExporter();
exporter.setApplicationContext(applicationContext);
exporter.afterPropertiesSet();
// initialize web socket management which was left out in "big" intialization
CCInitialize.postInitializeWebSocketPolling(servletContext);
}
};
}
@Bean
public ServletContextInitializer initializer()
{
return new ServletContextInitializer()
{
@Override
public void onStartup(ServletContext servletContext) throws ServletException
{
// set tracking mode
Set<SessionTrackingMode> stms = new HashSet<>();
stms.add(SessionTrackingMode.URL);
servletContext.setSessionTrackingModes(stms);
// initialize
CCInitialize.setInitWebSocketPolling(false); // is initialized in endpointExporterInitializer
CCInitialize.initializeCCEnvironment(servletContext,true); // true => forceReset!
// set classloader in HotDeployManager in order to support live reload
HotDeployManager.setCurrentParentClassLoader(SBApplication.this.getClass().getClassLoader());
HotDeployManager.triggerCreationOfNewInstance();
// output some information
try
{
System.out.println("########## " + servletContext.getRealPath("/"));
}
catch (Throwable t)
{
t.printStackTrace();
}
}
};
}
}
You can move this class to any package of your choice – all relevant Spring parts are annotated and will be discovered automatically by Spring.
The “SBApplication” class contains the instructions how to start the CaptainCasa runtime within the Spring Boot container. The central method to do so is “CCInitialize.initializeCCEnvironment(...)” - but there are other, special definitions as well:
The session tracking mode (URL or Cookie) needs to be initialized
The initialization of CaptainCasa's web socket management must not be executed as part of the normal starting process but must be done later in method “endpointExporterInitializer(...)”
The CaptainCasa hot deploy management must be notified about the current Spring class loader (which is esp. important when using Spring live reload).