As usual: the following describes one way to do it. There may be others – if better ones: let us know! - We did the installation in a Windows environment, so please forgive us that script files end with “.bat”.
Download JBoss EAP 7.3.0 (https://developers.redhat.com/products/eap/download) and install in any directory.
After installation start the standalone instance:
<jbossinstalldir>/bin/standalone.bat
In our case we had a port conflict with the admin port “9990” that is used by JBoss, so we updated the configuration file for the standalone instance to now use port “9991”:
File: <jbossinstalldir>/standalone/configuration/standalone.xml
Updated content:
...
<socket-binding-group ...>
<socket-binding name="management-http"
interface="management"
port="${jboss.management.http.port:9991}"/>
</socket-binding-group>
...
To check that JBoss is running open the following URLs:
http://localhost:8080 => JBoss server
http://localhost:9991 => JBoss admin server (with our changed port 9991, otherwise 9990)
By default you now package your web applications as “xxxx.war” file and you either use the admin pages or the admin console or the “<jbossinstalldir>/standalone/deployments” directory to add your “xxxx.war” file.
This is the deployment that you should use for production installations.
For development purposes this is a quite heavy way of bringing results from your development to the JBoss runtime, because it always requires the fully cycle of building the .war file and deploying it.
JBoss allows to pass the data as exploded “.war”. You need to pass the application in the following way:
<jbossinstalldir>
/standalone
/deployments
/xxxx.war
/eclnt
/eclntjsfserver
/WEB-INF
/META-INF
...
This means: create a directory which must end with extension “.war” and copy the whole content (which normally is packaged inside your “xxxx.war” file) below.
Now JBoss uses this directory as base for running your application.
The default JBoss way is now to regularly check the directory for updates. If JBoss finds changes then it automatically redeploys the application. This allows to update the system by only changing particular files. But: this is still quite an effort. If changing e.g. one JSP file then the whole application is redeployed.
During web development you quite often change files (jsps, images, ...) which do not require a full application reload. And CaptainCasa in addition has a deployment concept which operates below the web application level and which does not require full application reloads for updating Java classes.
Result: we are now looking for a way to more explicitly control the redeployment.
We switched off the automatic scanning for updates by setting a scan timer which is a really big one...
File: <jbossinstalldir>/standalone/configuration/standalone.xml
Updated content:
...
<subsystem xmlns="urn:jboss:domain:deployment-scanner:2.0">
<deployment-scanner
path="deployments"
relative-to="jboss.server.base.dir"
scan-enabled="true"
scan-interval="5000000"
auto-deploy-exploded="true"
runtime-failure-causes-rollback=
"$jboss.deployment.scanner.rollback.on.failure:false}"/>
</subsystem>
...
We did not disable the scanning because we still want JBoss to recognize the deployed applications below “<jbossinstalldir/standalone/deployments” when starting up. But during runtime we do not want implicit redeployments that are triggered by file changes.
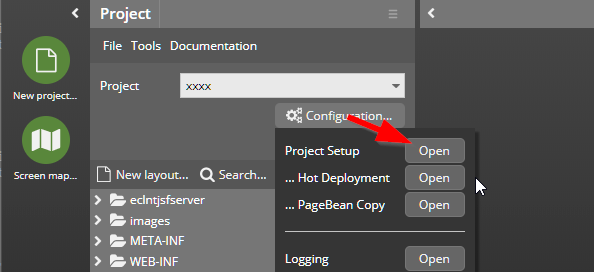
When working with the CaptainCasa tools each project has a target directory to which all the content of the web application is copied to when either starting “reload” or “hot deploy” from the tools. This is exactly what is required to copy the content of the application into the exploded JBoss directory.
This means: update your CaptainCasa project:
Set the “webdeploymentdirectory” so that it points to the corresponding directory in your JBoss installation:
<project
...
webcontentdeploydirectory="C:/jboss/EAP-7.3.0/standalone/deployments/xxxx.war"
...
>
...
...
(Replace the “C:/jboss/EAP-7.3.0” with the installation directory of your own installation, of course!)
After the first reload within the toolset all files of the application are copied to JBoss. JBoss now requires (only for the very first time!) a restart to recognize the application.
You now can use the CaptainCasa tools just as normal: layout changes in the Layout Editor are immediately reflected in the preview (because the Layout Editor writes its files both into the project directory and into the runtime directory).
When working with hot deployment (which we always recommend!...) then you can immediately hot deploy from the CaptainCasa toolset. The content of the application is copied from the project into the JBoss-deployments directory and the hot deployment classloader will reload classes.
While hot deployments are used in the area of UI classes, you application typically has “heavyweight” classes for managing the application logic, persistence, etc. These class are e.g. contained in .jar files that are part of the WEB-INF/lib directory.
In case of changing these classes – or in case of also changing configuration files (web.xml, CaptainCasa configuration files) a “real” redeployment of the application has to happen.
We did not find a way yet to trigger this reload from our toolset. But: using the JBoss command line interface you can do this in a very lightweight way:
1. Start command line interface:
<jbosinstalldir>/bin/jboss-cli.bat
2. From command line:
/deployment=xxxx.war:redeploy()
So after doing the “Reload” from the CaptainCasa toolset (copying the files into the deployment), redeploy the whole application by using the command line.
This is some quite special information – but it took us some time to find out, so we share it...
When running Page Beans using CaptainCasa's hot deployment then by default page beans are constructed using their normal constructor – and they are not passing the J2EE BeanManager which not only creates the instances but also manages injections, e.g. of Enterprise Java Beans.
The BeanManager by default works within the classloader scope of the web application (“the classes below WEB-INF/classes and WEB-INF/lib”) and has problems to work properly with classes loaded in a different classloader.
The creation of beans in the CaptainCasa environment by default starts with the dispatcher (class “Dispatcher”), which is the “#{d.”-expression that is contained in all page beans. The dispatcher itself is an implementation of “java.util.Map”, so the next object referenced behind the dispatcher (e.g. “#{d.XyzBean”) is created via the “get(...)”-method of the dispatcher. This “get(...)” method calls several other methods if the bean is not available, finally calling the method...
public class Dispatcher extends WorkpageDispatcher
{
...
...
@Override
protected Object createObjectInstance(Class resultClass) throws Exception
{
...
}
}
The “resultClass” is now depending on the classloader. After hot-deploying the server, page bean classes will be re-newed. This means: the Class-instances are different ones then before, though keeping the same class-name.
The following code creates an instance of the class using the normal dispatcher's functions and then uses certain J2EE methods to pass this instance through the BeanManager so that injection is executed:
BeanManager m_beanManager;
@Override
protected Object createObjectInstance(Class resultClass) throws Exception
{
return createBeanViaCaptainCasaAndInject(resultClass);
}
private Object createBeanViaCaptainCasaAndInject(Class resultClass) throws Exception
{
try
{
// create the bean via cc
Object obj = super.createObjectInstance(resultClass);
// inject via bean manager
loadBeanManager();
CreationalContext<Object> cctx = m_beanManager.createCreationalContext(null);
// The createAnnotatedType in its J2EE calling way is "stupid" because
// it looksup results by className only!!! So: same class, but loaded with
// different classLoaders will fail. For this reason: use the JBoss-WeldManager
// class's extended version of createAnnotatedType, where some String can
// be passed as identifier in addition.
// AnnotatedType<Object> annotatedType = m_beanManager.createAnnotatedType(resultClass);
Method m = m_beanManager.getClass().getMethod("createAnnotatedType",Class.class,String.class);
Object mResult = m.invoke(m_beanManager,resultClass,resultClass.getName()+"/"+resultClass.hashCode());
AnnotatedType<Object> annotatedType = ( AnnotatedType<Object>)mResult;
InjectionTarget<Object> injectionTarget = (InjectionTarget<Object>)m_beanManager
.getInjectionTargetFactory(annotatedType)
.createInjectionTarget(null);
injectionTarget.inject(obj,cctx);
return obj;
}
catch (Throwable t)
{
CLog.L.log(CLog.LL_ERR,"Could not create bean in Dispatcher",t);
throw new Error(t);
}
}
private void loadBeanManager() throws Exception
{
if (m_beanManager == null)
m_beanManager = (BeanManager) new InitialContext().lookup( "java:comp/BeanManager" );
}
You see that at a certain point some internal but public method of JBoss is used – and called via reflection (otherwise you would have to import JBoss-libraries into your project).
You may use the same code for injecting any other object that you create within the processing of the PageBean-instance within the classloader that is defined by hot deployment.
Please note:
You only must use this code when running in hot-deployment! We recommend not to use hot-deployment at runtime!
This code is result of our “JBoss-research” - maybe it does not cover all aspects of managing a bean via the BeanManager! So please test with your concrete scenarios.
And of course: any additional hints from your side are appreciated!